Skip to content
Stu's Kitchen
Navigation menu
Shop
How It Works
Recipes
Our Story
Login
Search
Cart
Close
Shop
How It Works
Recipes
Our Story
Cart
Your cart is empty
Filter
Sort by
Sort by
Featured
Most relevant
Best selling
Alphabetically, A-Z
Alphabetically, Z-A
Price, low to high
Price, high to low
Date, old to new
Date, new to old
1 product
Filters
Availability
In stock only
Price
$
to
$
View results
View results
Availability
In stock only
Price
$
to
$
View results
Add to cart
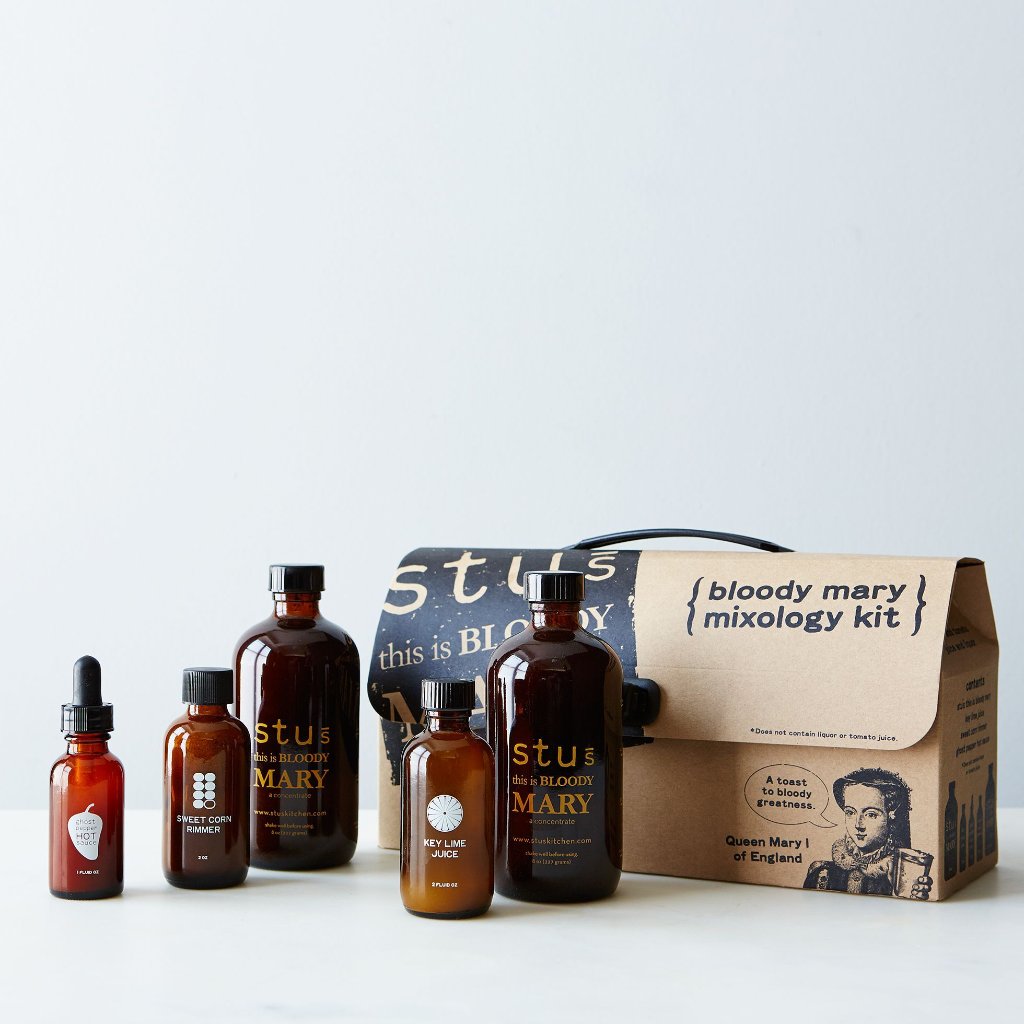
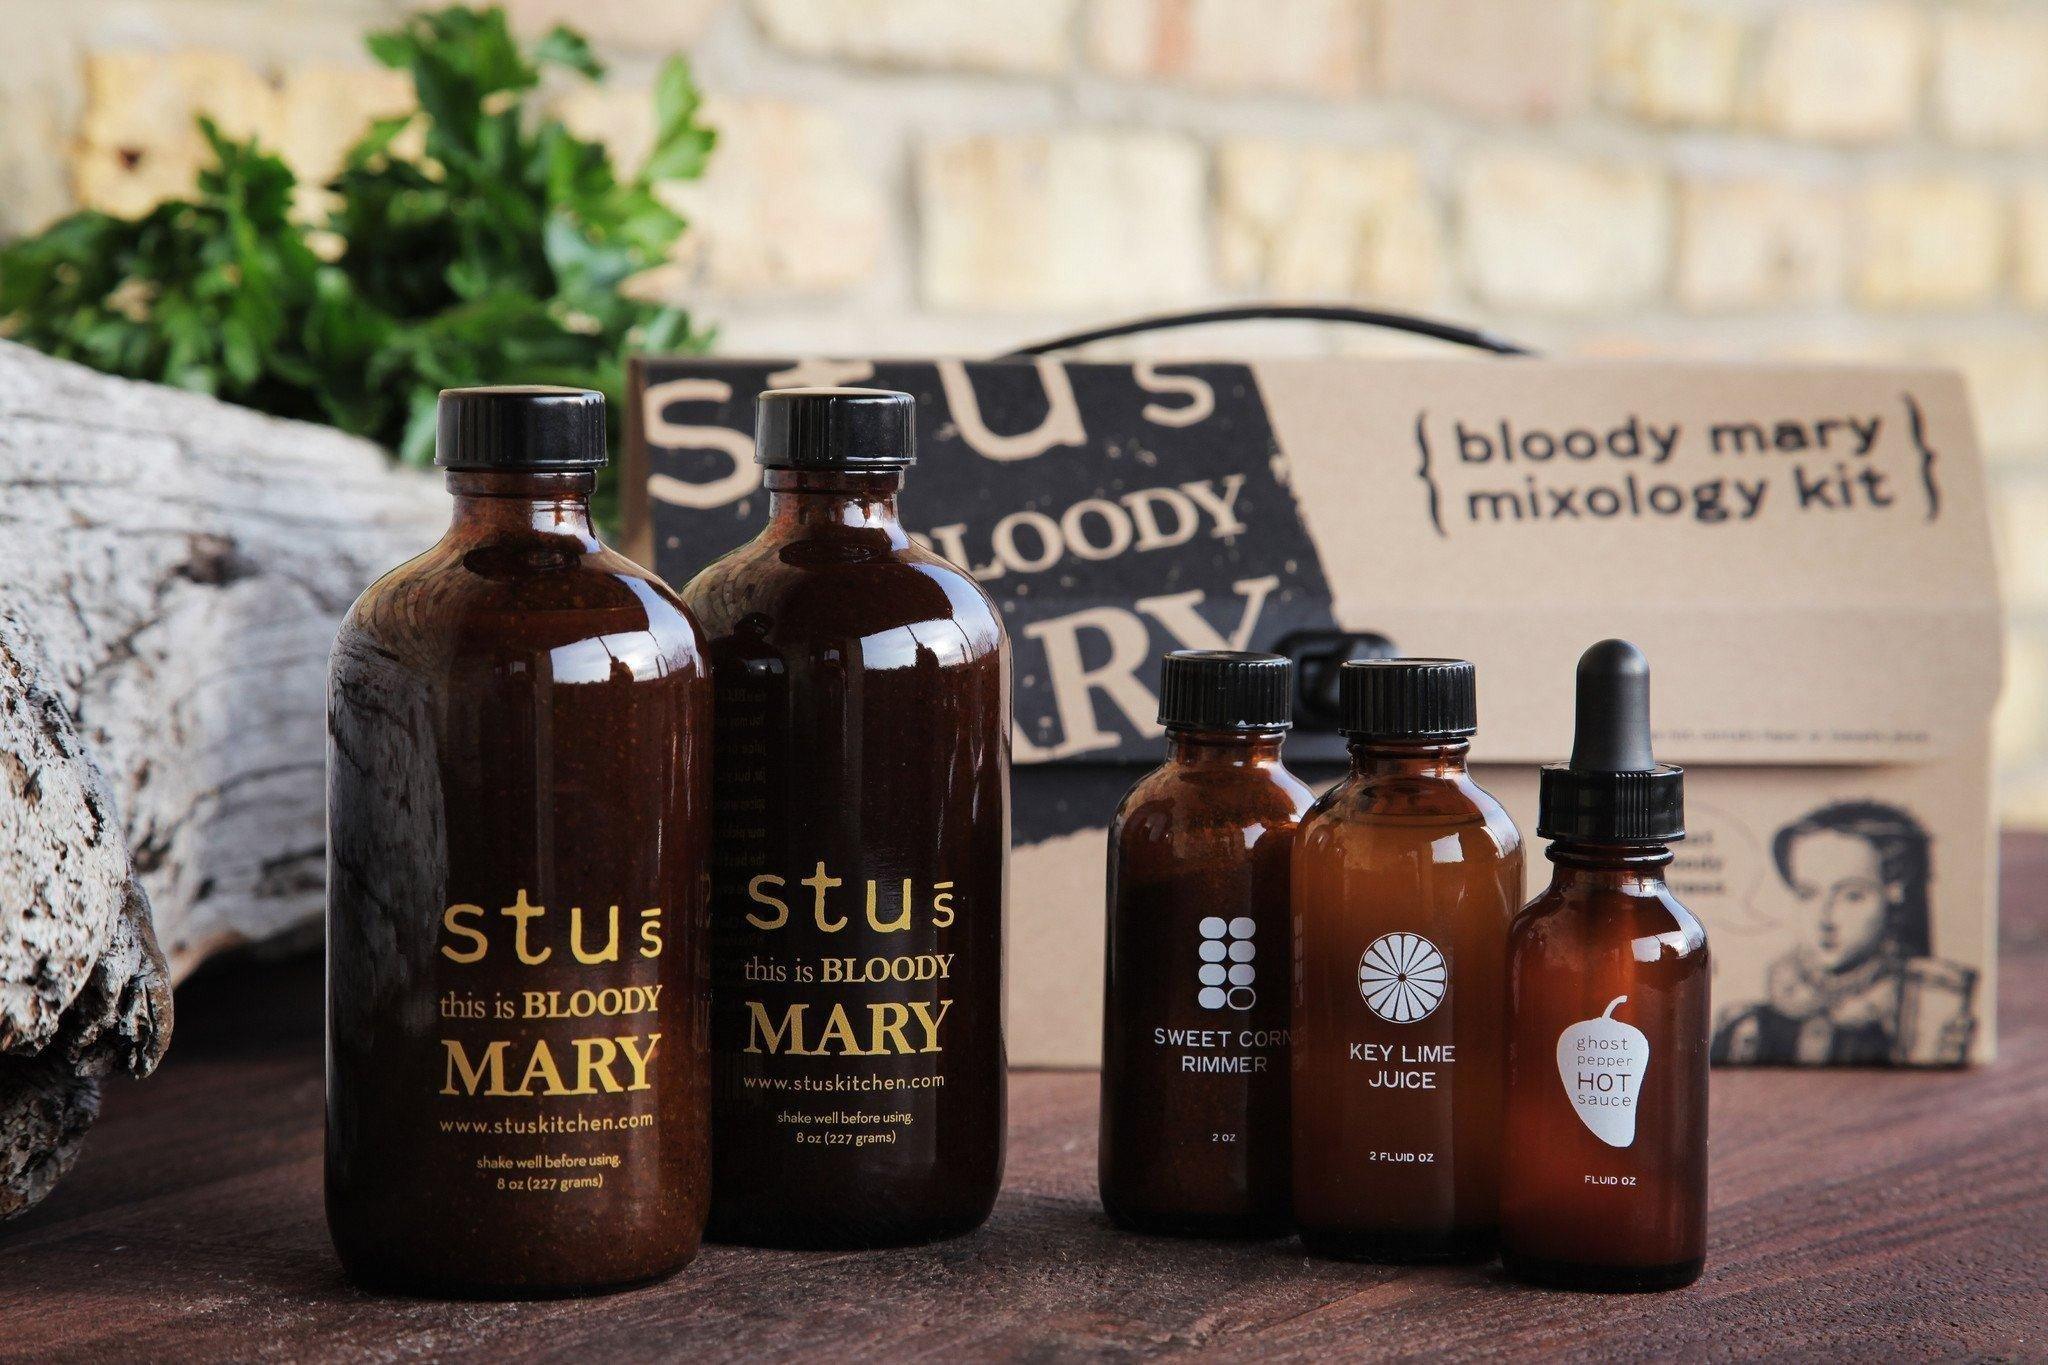
Stu's Bloody Mary Mixology Kit
Sale price
$45.00
(5.0)